The following are instructions for creating a VM on the Azure Preview site. The VM will be running Windows Server 2008 R2 Datacenter edition (64bit) with service pack 1 and SQL Server 2012. Demo assumes the user already has an Azure account.
1) Go to the Azure (preview) web site with your browser. http://www.windowsazure.com/en-us/
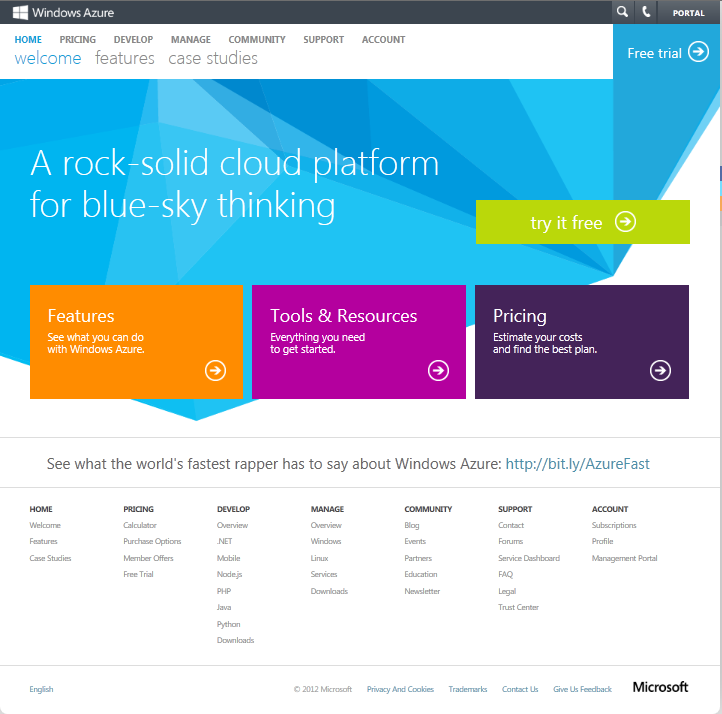
2) Click on the “Management Portal” link in the lower right corner of the Azure home page under “Account”.
3) In the management portal, click on the “new” link at the bottom left portion of the screen.
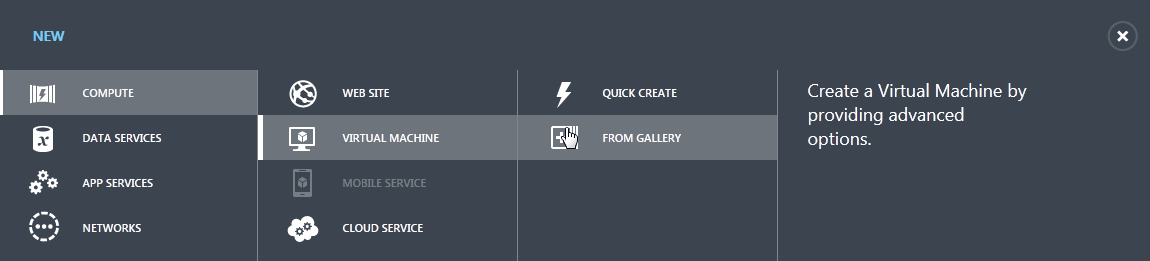
4) Select “Commute”, and then “Virtual Machine”, and finally “From Gallery”. A Quick Create allows you to currently create several different Windows server instances with various enterprise software such as BizTalk and SQL server.
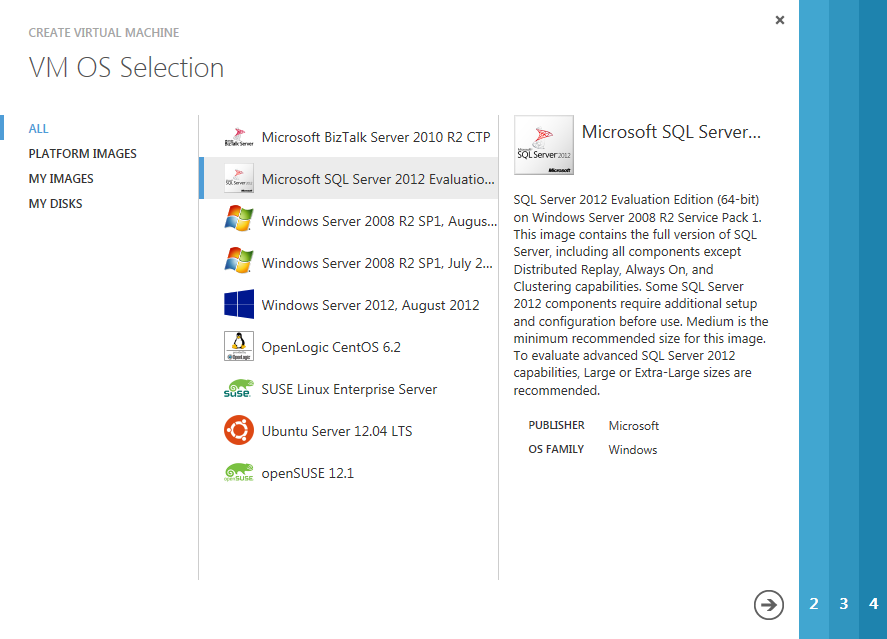
5) Select “Microsoft SQL Server 2012 Evaluation” from the gallery. A medium sized VM is the minimum requirement with a large or extra large VM recommended for use when using the advanced features of SQL server. A medium instance is configured as (2 CPU cores, 3.75 GB of memory. Cost in preview is \$0.16/hour and \$0.23/hour in GA). Large (4 cores, 7GB, \$0.32, \$0.46). Extra Large (8 cores, 14GB, \$0.64,\$0.94). The processor, when I checked, was an AMD Opteron running at 2.09 GHz. The VM contains two disk partitions. One containing the operating system and is 32GB in size and a second storage partition (D: drive) containing ~140GB. The OS for this gallery selection is Windows Server 2008 R2 SP1 (64 bit) . The DB is SQL Server 2012 Evaluation Edition (64-bit).
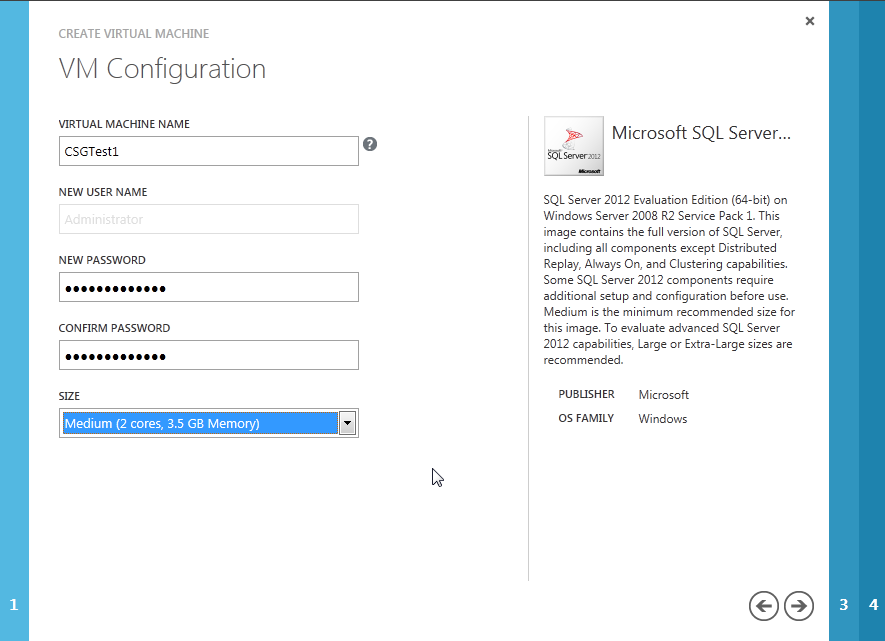
6) The first step in configuring the new VM is to select a VM Name (Windows name) and select a password for the “Administrator” user account. Also, select the machine size, this can be updated at a later time if more or less resources are needed.\
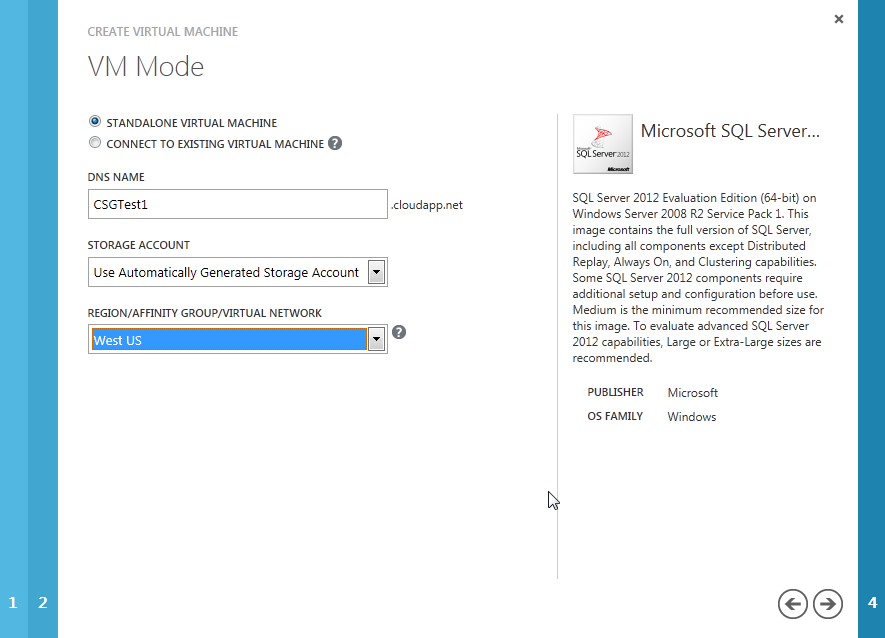
7) In the next step, select a DNS name for the machine. (I tend to have the same VM name as DNS name). You can connect to an existing VM to share the workload of the existing VM with the new one. You can use an existing storage account or let Azure create a new one for you. Finally select the Region for your new VM.
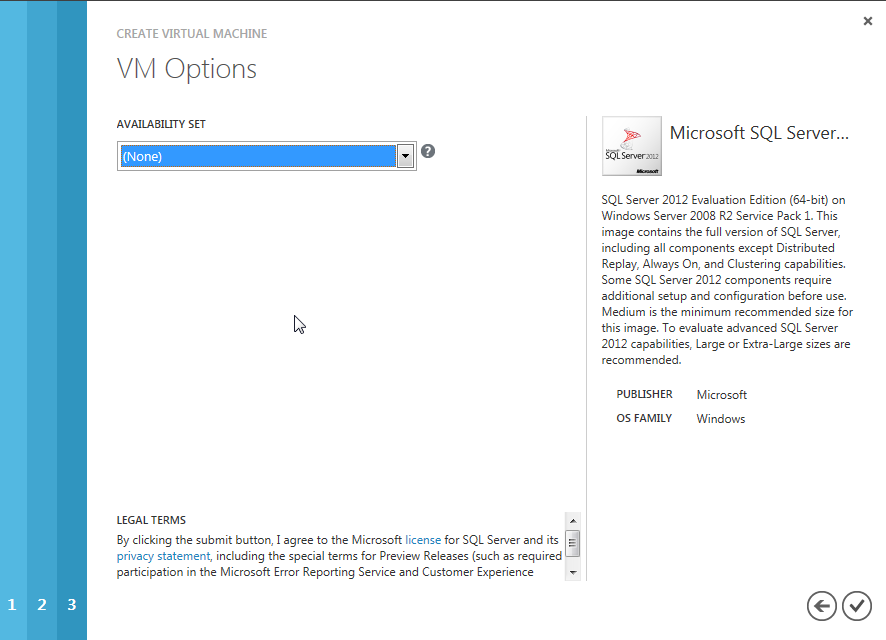
8) Select an Availability set if needed. (An availability set is a group of virtual machines that are deployed across multiple physical locations (called fault domains), which helps protect the machines in the group from outages). Click on the Check mark in the Bottom right corner to agree to the license agreement, privacy statement, and create the VM. The VM usually takes 10-15 minutes to start up.
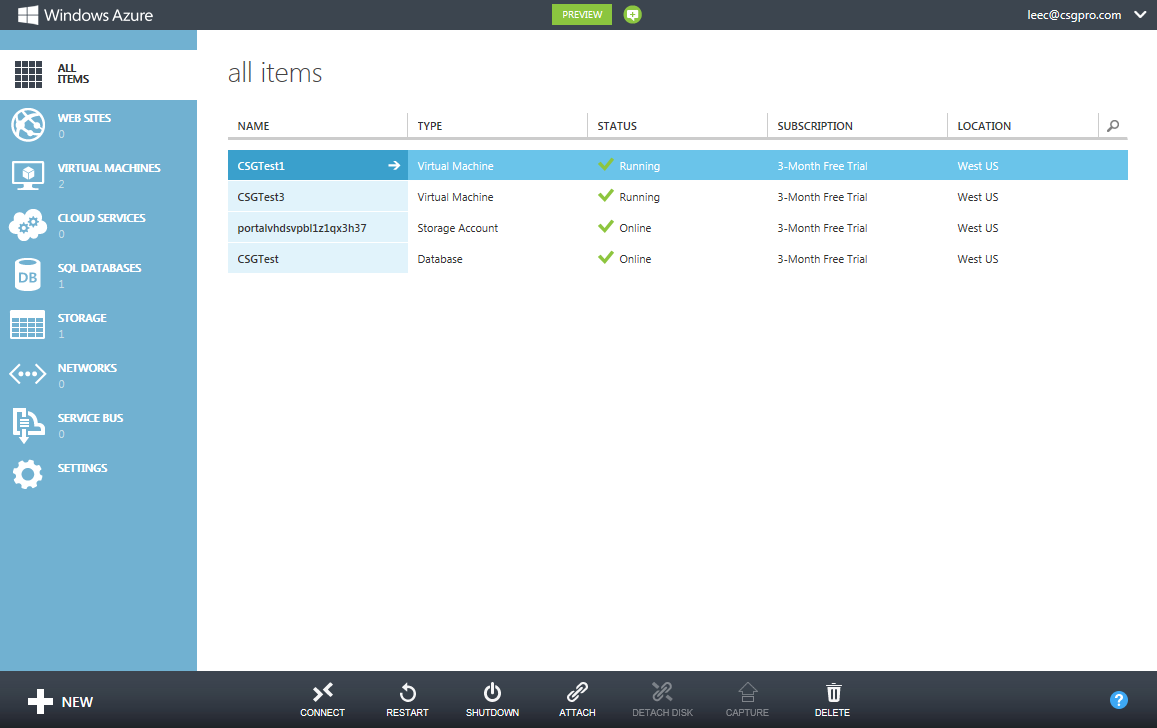
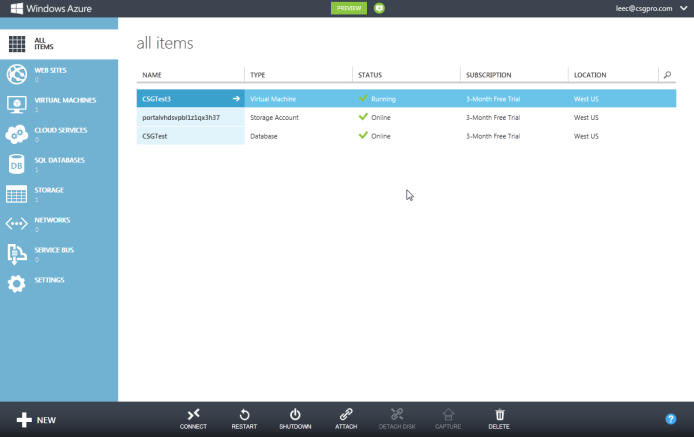
9) After your VM is up and running it should appear in your portal on the web site. Click on the VM name for addition configuration info.
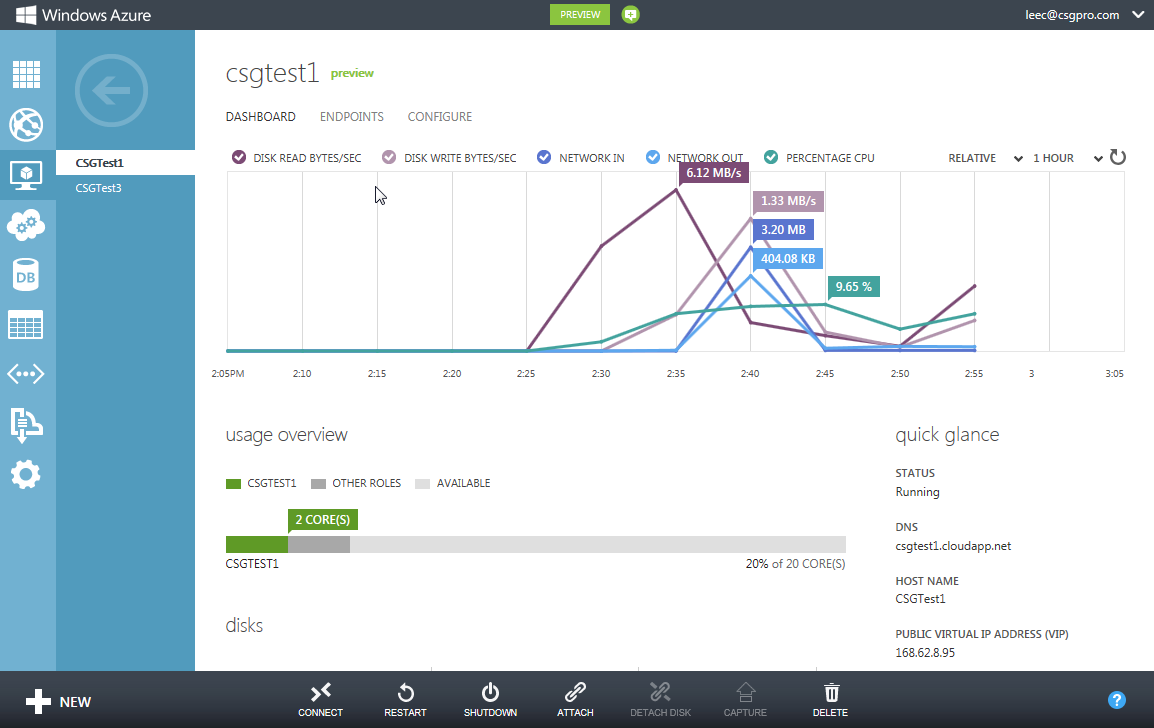
10) Click on the “ENDPOINTS” link near the top of the page to configure a connection to the SQL server.
11) Click on “ADD ENDPOINT” at the bottom of the “ENDPOINTS” view in the management portal.
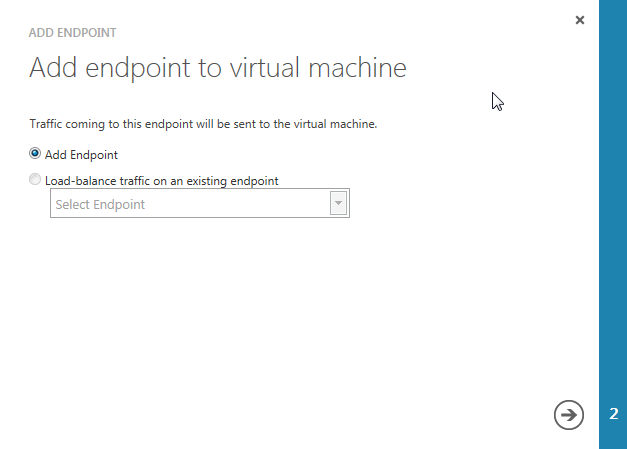
12) Select “Add Endpoint” radio button and click on the arrow key for the next step.
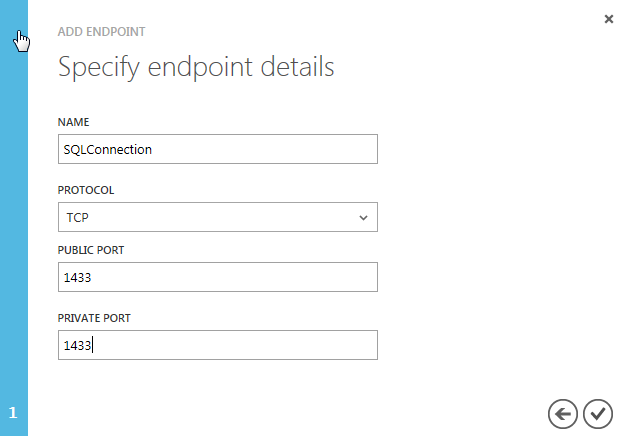
13) Configure the TCP port to connect to the SQL server. Click on the check mark in the lower right corner to create the endpoint. This will take you back to the “ENDPOINTS” screen and you can watch while the end point is being configured. Once the endpoint is up and running, click on the “Dashboard” link at the top of the page. This should take you back to the management screen shown in step 10.
14) Click on the “Connect” link at the bottom of the screen to start a remote desktop connection to the VM. Agree to all the security pop-ups and enter the password for your administrator account you set up for the VM.
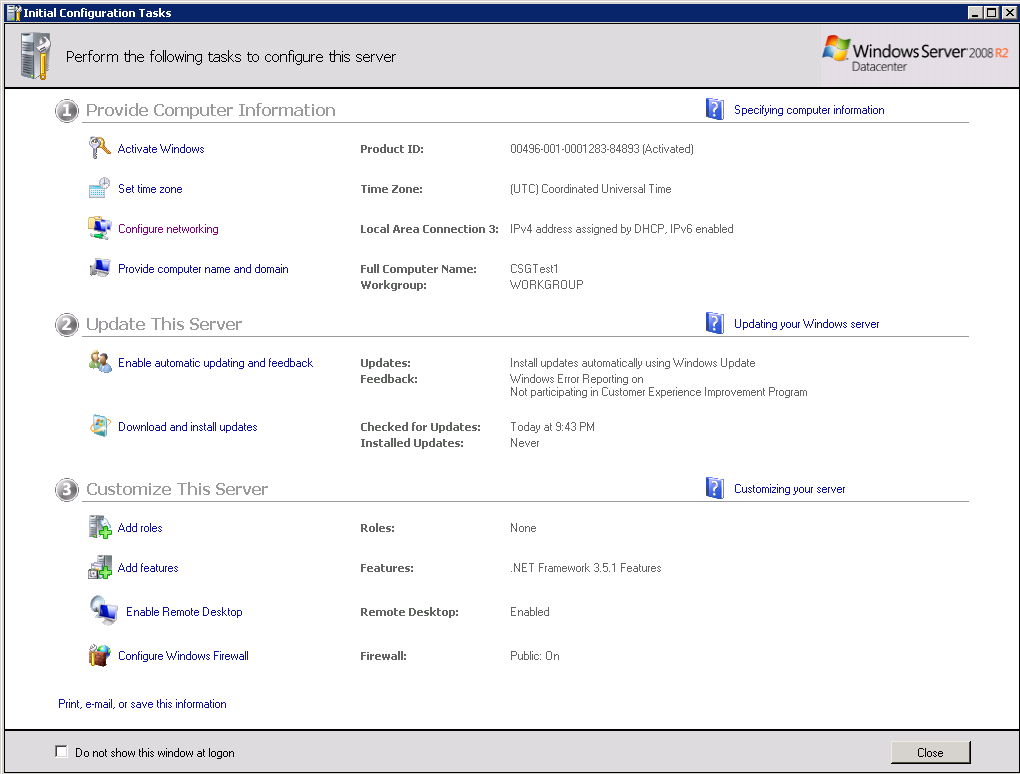
15) In the remote desktop, click on the “Configure Windows Firewall” link at the bottom of the Initial Configuration Task to set up port 1433 to allow incoming traffic.
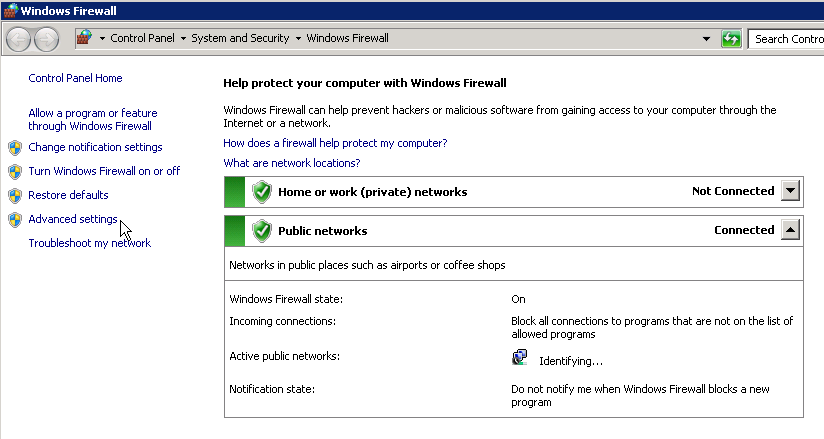
16) In the “Windows Firewall” window, click on “Advanced Settings”.
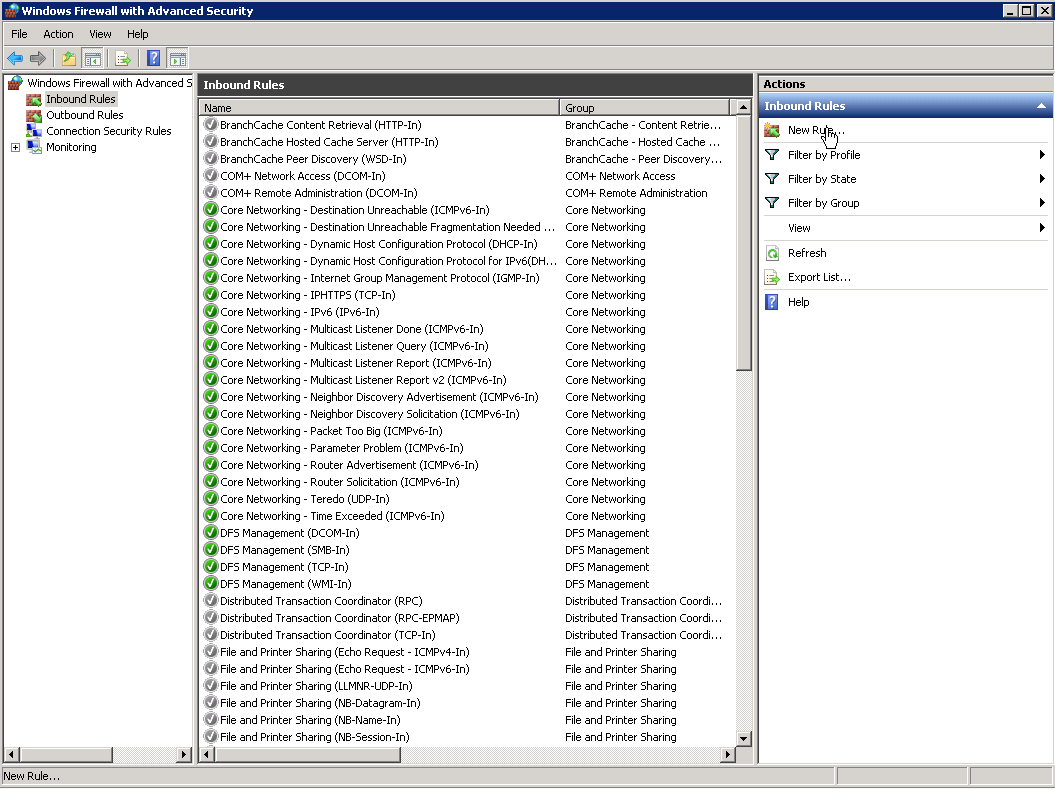
17) In Windows Firewall advanced settings, click on the “Inbound Rules” in the top left corner. Select “New Rule” under “Actions” on the right side of the screen.
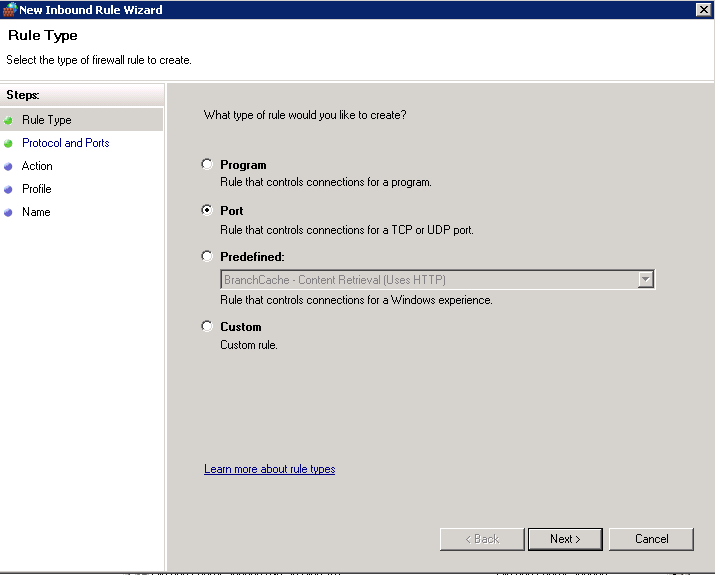
18) Select “port” as rule type and click next.
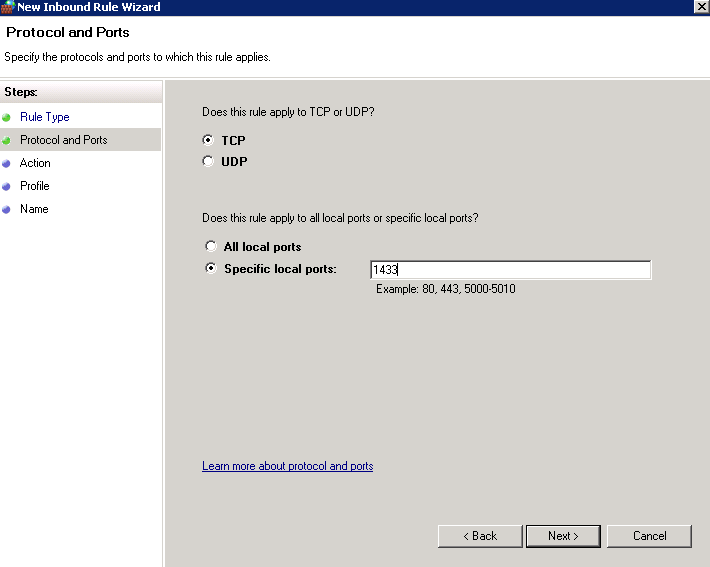
19) Select TCP and specify port “1433”. Click next.
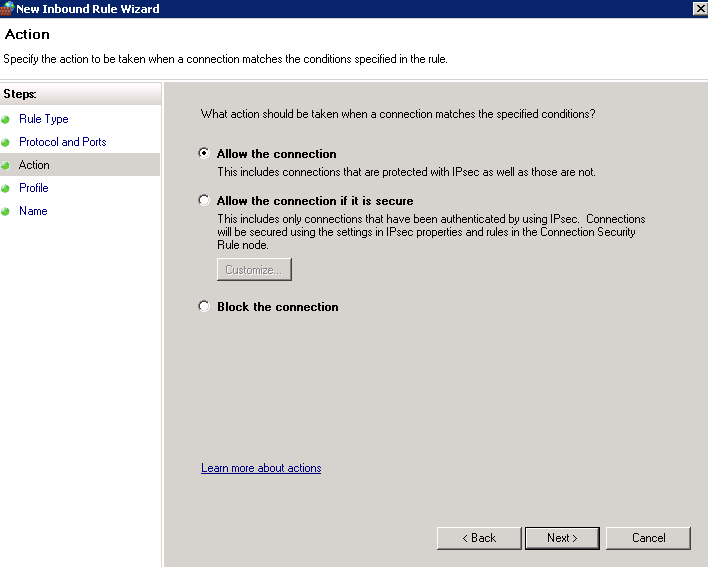
20) Click on the radio button to “Allow the connection” and then click next.
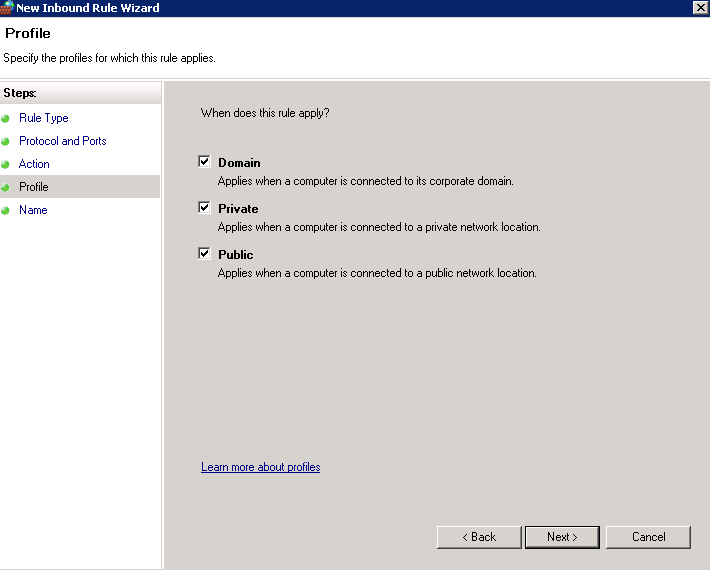
21) For this demo we will select all the profiles including public. Optionally you can add an Azure to your local domain or secure the connection with a certificate.

22) Finally, give the new firewall rule a name and description and click finish.
23) Exit out of all the firewall windows.
24) Open up the “SQL Server Management Studio” from the start menu. It is located under All Programs => SQL Server 2012
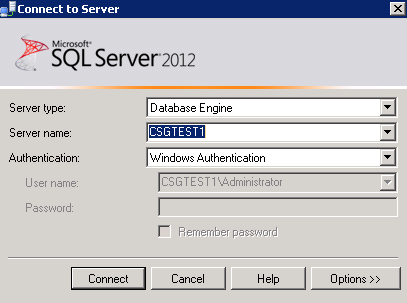
25) Connect to the SQL Server using Windows Authentication with your windows admin credentials.
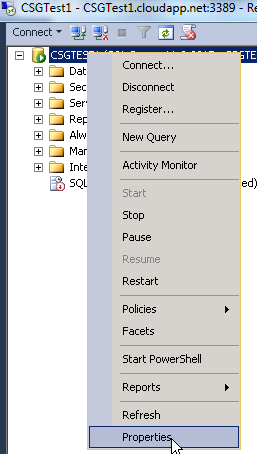
26) Right click on the SQL Server instance in the connection window and select “Properties” from the pop-up menu.
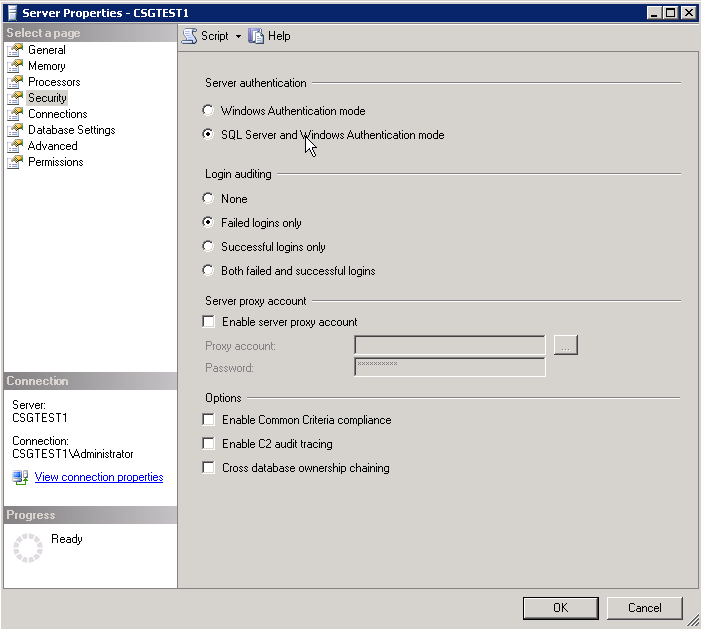
27) Click on “Security” in the “Server Properties” window and select “SQL Server and Windows Authentication mode”. Click ok.
28) Stop the SQL server by right clicking on the SQL server instance and selecting “Stop” from the pop-up menu.
29) Start the SQL server by right clicking on the SQL server instance and selecting “Start” from the pop-up menu.

30) Create a new DB to use in your project.
31) Create a new SQL Server login for the DB by right clicking on “Logins” under “Security in the management console add select “New Login” from the pop-up menu.
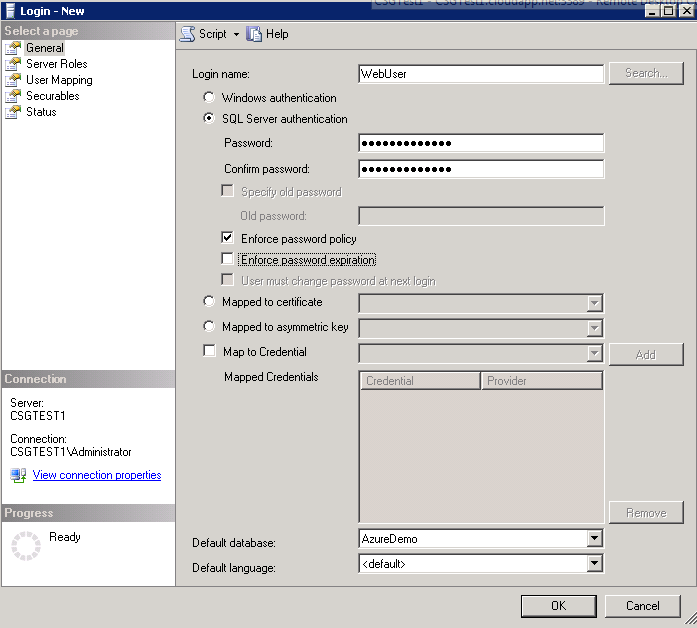
32) When creating the new user, be sure to select “SQL Server authentication. Enter appropriate info and select a default DB.
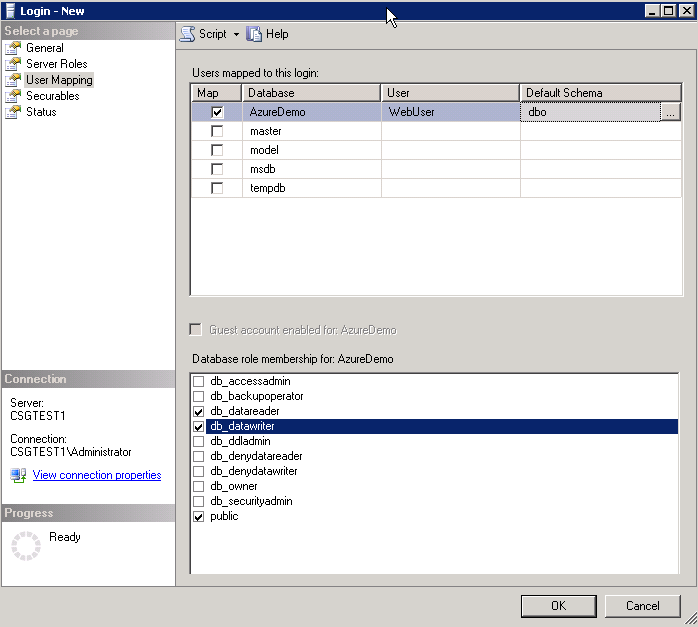
33) Under “User Mappings” give appropriate access to your new user.
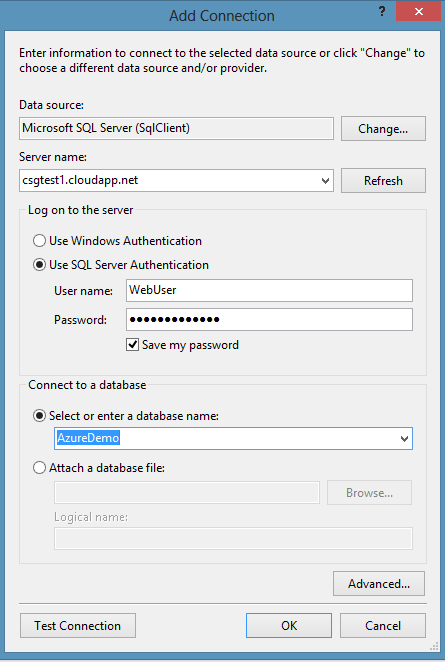
34) You are now ready to set up a connection with Visual Studio.